Posted on Leave a comment

A Middle Eastern Inspired Hummus

I can’t remember the last time I actually bought a dip from the store, it’s been that long. Admittedly, on occasion you can find dips that are full of the good stuff but a huge majority are full of a whole bunch of ingredients and numbers that are more likely made in a laboratory than a farm. This particular recipe is the simplest of them all. I’ve always got a can of organic chickpeas in my pantry (yes, canned is not ideal but if you’re in a hurry this is a far better alternative than choosing store bought). If I could suggest, next time you grab your dip from the supermarket, take the time to turn it around and read the label. If its use by date is beyond a week you know you’re consuming additives that your body doesn’t need. In fact, if there are numbers or words on the back you don’t understand, my advice would be to pop it back on the shelf. Why eat food that doesn’t add value to your awesome life?

You may well have noticed the hummus slathered generously over the Hearty Tempeh Falafels we whipped up from Lesh Karan’s (aka The Mindful Foodie) eBook Nourished earlier in the week. Well these two recipes really do go hand in hand. So who am I to keep you from experiencing the taste sensation of this delicious duo? Here is the recipe for the most quick, simple and rubbish free hummus you will ever eat.

This recipe creates a hummus that is smooth and reasonably runny, a traditional Middle Eastern consistency. If you’d like it thicker, perhaps if you intend to use it as a dip with crackers, simply reduce the quantity of water included in the directions below.

You’ll need:
1 can chickpeas
2 tablespoons extra virgin olive oil
2 tablespoons lemon juice
2 tablespoons tahini
1/3 -2/3 cups water
1/2 teaspoon cumin
1 garlic clove
Sea salt to taste

Open the can of chickpeas and place them into a colander or strainer. Rinse very well. Allow the tap to run over the chickpeas for a good couple of minutes. Place all ingredients into a blender or food processor and combine until smooth. Hummus are awesome with crunchy crackers, raw crudites, dolloped over salads, in wraps…you name it!


Source: theholisticingredient.com

Posted on Leave a comment

Roast Chicken with Quinoa, Pistachio & Cranberry Stuffing, a recipe by Lola Berry

As promised, today on the blog we share a recipe contributed by our inspirational March Guest of the Month, Lola Berry. This scrumptious Roast Chicken is a recipe from Lola’s beautiful new cook book, The 20/20 Diet Cookbook. As the weather cools here in the South, there’s no better time to be sharing a tummy and kitchen warming roast chook. Who doesn’t love a roast for goodness sake? Thank you Lola for sharing the love with us today, I’m so looking forward to a long roast lunch.

Serves 6.

You will need:
1 x 1.5kg chicken
1 cup quinoa, rinsed
1/3 cup coconut oil
1/2 cup pistachios, chopped
1/2 cup dried cranberries
6 thyme sprigs
2 carrots, chopped
2 celery stalks, chopped
1 brown onion
1 pear, cored, finely diced
1 lemon, quartered
1 red onion, chopped
Freshly ground black pepper
Salt

Preheat the oven to 220 degrees C. Place the quinoa in a saucepan with 2 cups of water, cover and bring to the boil. Reduce the heat and simmer for 10 minutes until quinoa is cooked (it triples in size and sprouts little ‘tails’).

Heat 2 tablespoons of the coconut oil in a frying pan over a medium heat. Sauté the onion for 2 minutes or until translucent. Add the pear and cook until it begins to soften (about 4-6 minutes). Remove from the heat.

In a large bowl place the pistachios, cranberries and cooked quinoa. Fold through the onion and pear combo and mix well. Spoon the mixture into the chicken cavity, pressing firming. Finally, pop the four lemon quarters and thyme sprigs in.

Place the carrots, celery and red onion in the baking dish (this will become the ‘trivet’, which elevates the chicken so it cooks evenly). Pop the stuffed chicken on top. Rub the remaining 2 tablespoons of coconut oil into the chicken skin and give it a generous seasoning with salt and pepper (this will help it become crispy). Reduce the oven temperature to 200 degrees C and roast for 1-1&1/4 hours or until the skin is golden and the juices run clear when you pierce the thigh with a knife point. (If the juices are pink, roast for another 10 minutes).

Remove the chicken from the oven and allow it to rest for 10 minutes before carving. Serve with the trivet vegetables (or a side of your choosing) and some stuffing, and I promise you everyone will be coming back for seconds!

Follow Lola on Facebook, Twitter and Instagram, and find her 20/20 Diet Cookbook at your local bookstore.

Source: theholisticingredient.com

Posted on Leave a comment

Gluten Free Summer Pudding

Gluten-Free-Summer-Pudding

Back in “the day” I’d be all over a traditional Summer Pudding. Sugary-berry-puree-soaked-white-bread lining the bowl, cooked sugary berries filling its cavity. Of course the Summer Pudding was at it’s finest when dolloped with vanilla infused whipped cream. Yum scrum.

All however, is not lost. I decided to set my hand to ‘healthyfying’ this very pudding by removing the gluten and refined white sugar and by leaving the berries raw. The result? A far lighter, healthier and less indulgent version of the traditional pudding.

Gluten Free Summer Pudding

* Pudding best made the day before consumption. See other recipe notes below to ensure summer pudding success. 

Serves 6 min.

700 grams fresh berries (raspberries, strawberries, blueberries etc)
1 loaf gluten free bread (or approximately 12 slices)
4 heaped tablespoons coconut sugar (or sweetener of choice)
Whipped coconut cream or Greek yoghurt to serve

Extra fresh berries for serving.

Find yourself a pudding mold or mixing bowl of similar shape to my pudding. In the absence of a pudding bowl I used a 1.5 litre mixing bowl.

Into a bowl, measure out 250 grams of berries (cut strawberries in half if large) and mix through 2 heaped tablespoons of coconut sugar. Set aside.

Into a food processor, place the remaining 450 grams of berries and 2 heaped tablespoons of coconut sugar. Puree until smooth. Strain the puree through a sieve to remove all the seeds. Test for sweetness, add more sweetener if your taste buds tell you too. Pour the mixture into a shallow bowl.

Remove the crust from enough slices of bread to line your bowl. Next, dip the slices into the puree and spread around the entire bowl, making sure there are no gaps. Cut out shapes as necessary to fill remaining gaps. Return remaining puree to the fridge for later.

Fill the mold with the berries, pressing down firmly and line the top with more puree dipped bread.  Then, pop a saucer on top of the lot and weigh down with a heavy can (or two if they fit). Pop this into the fridge overnight (or 4 hours minimum, though I do feel overnight will produce better results).

Remove from the fridge and with the saucer in place gently turn upside down to allow the pudding to fall out. If there are any white spots on the bread use extra puree to colour. Scatter fresh berries over the pudding. Serve with extra puree and whipped coconut yoghurt or vanilla infused Greek yoghurt.


Recipe notes:

1. Opt for fresh gluten free bread (not frozen) that doesn’t break in your hands whilst dunking it in the puree (we all know the cardboard-like gluten free bread I’m talking about). I used a great brand called GF Precinct, made here in Victoria. 
2. I had trouble getting the bread out of the bowl, but managed.. Some recipes advocate the use of cling wrap – and as much as I would prefer not to recommend this I do think it’s the answer for those preferring to err on the side of caution. Alternatively try baking paper.
3. I don’t enjoy super sweet desserts – that being said, make the puree to the recipe and add more sweetness to taste if necessary. Feel free to sub coconut sugar with rice malt syrup or raw honey. 

Looking for some more festive season inspiration for your Christmas menus? Check out our Top Ten healthy (and sweet) Christmas Recipes or our Top Ten Healthy (and Savoury) Christmas Recipes.

Gluten Free Summer Pudding

Feel free to share this recipe with the gluten free’ers in your life, or better still,pin it to your healthy pinterest board so it’s at your fingertips when you’re ready to get creative.


Source: theholisticingredient.com

Posted on Leave a comment

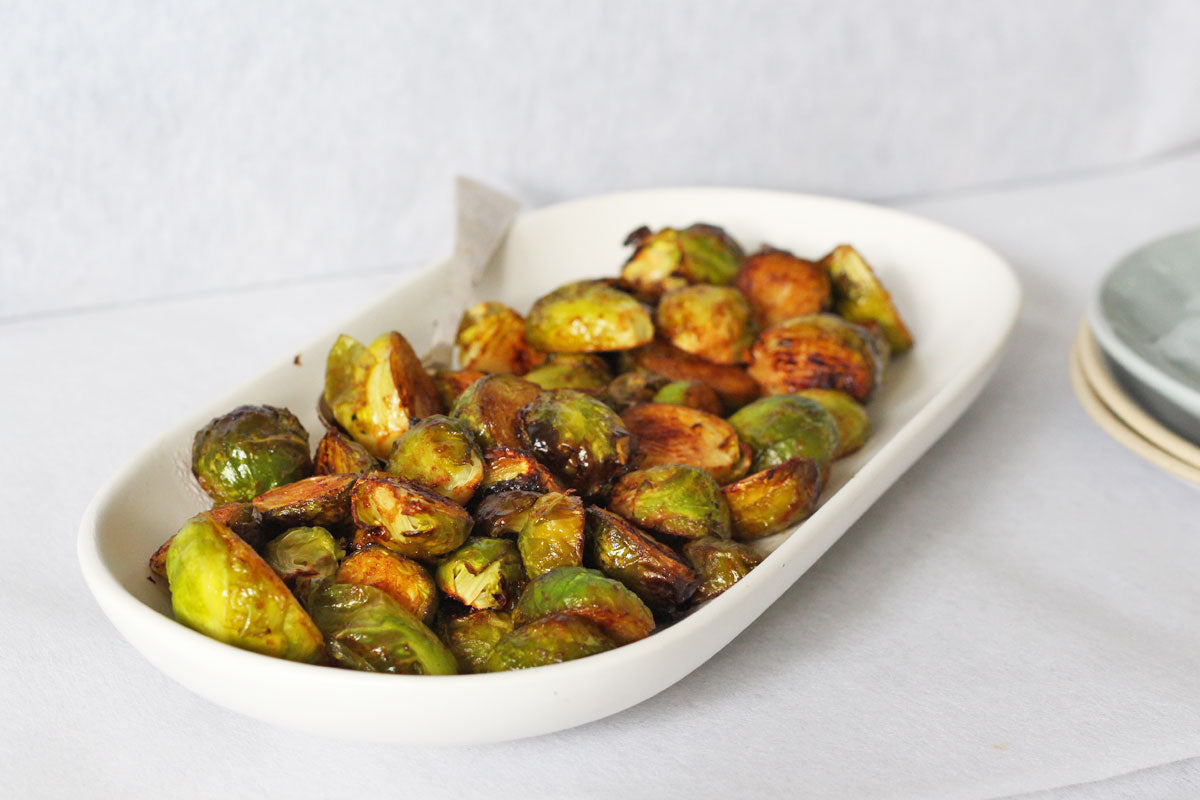
Wasabi and Tamari Roasted Brussels Sprouts

Wasabi-and-Tamari-Roasted-Brussels-Sprouts

One of the best things about eating only seasonal produce is the way it feels when their times comes around again – you get such a lovely suprise when they greet you in store, in the season for which they belong. Mangoes and raspberries in summer, figs towards the end of summer, mushrooms in autumn, and on it goes. It’s difficult to tire of such foods when you know you’ve got limited time together; it keeps things interesting and inspiring in the kitchen.

One of the most wonderful feelings for me each winter is the arrival of brussels sprouts and if I could be honest, by the time their season closes we are probably ready to part. The brussels sprout and I hang together a LOT.

Most of us, we’ve had our battles with these little bundles of goodness haven’t we. As a kid I sat up at the kitchen table until each cold and soggy sprout was forced down my reluctant throat. If my memory serves me correctly I’m pretty certain it was the way in which they were prepared that created such instant repulsion in my mouth.

I’ve decided that it’s my job today to INSIST that the brussels sprouts haters amongst you TRY THIS RECIPE. You hear me? Try this recipe and if you still can’t stand them you are hereby relieved from any further brussels sprouts consumption.

I’ll be honest though, I’ll be suprised to hear if their beautiful flavoursome, caramely burnty bits don’t win over your heart.. I’m that confident.

Wasabi and tamari roasted brussels sprouts

Serves 4 as a side.

500 grams brussels sprouts
1 tablespoon coconut oil, melted
1 heaped teaspoon wasabi paste
2 teaspoons tamari

Preheat your oven to 200 degrees celsius and line a baking tray with baking paper.

Rinse and dry your sprouts and trim their ends, removing any spoiled leaves from the sprout at the same time. Slice in half length ways.

In a large mixing bowl combine the coconut oil, wasabi and tamari. Adding your brussels sprouts to the bowl, toss until the sprouts are very well coated.

Spread out evenly onto your tray, cut side down and place in the oven for approximately 20 minutes, or until their edges turn a rich golden brown. Don’t be worried if you get black bits like I have – burnt edges on a brussels sprout are nothing to be scoffed at! You may though like to turn your oven tray around during cooking if your oven temperature is uneven.

Remove and serve immediately. These are also gorgeous over the next couple of days in a salad.

Roasted Brussels Sprouts with Wasabi and Tamari

So tell me, what is your favourite way to eat brussels sprouts? And if you’re not a lover, PLEASE let me know if I actually do manage to convert you with this recipe!

Source: theholisticingredient.com

Posted on Leave a comment

Creamy Celery Soup

Time to curl up under a cozy blanket and enjoy a warm bowl of soup. This week’s pick? A classic creamy celery soup.

Like cabbage, celery is an oft neglected vegetable, prized for its place in a mirepoix, but rarely the star of the show. Which is silly when you think about it, given how good celery is in soups. (Can you imagine chicken soup without it?)

Creamy Celery Soup

Celery soup, with a supporting cast of some onion, leeks, and a little cream, is utterly delicious, and the perfect way to warm up on a chilly day.

Recipe and photos updated, first published 2014

Follow me on Pinterest

Creamy Celery Soup Recipe

  • Prep time: 15 minutes
  • Cook time: 45 minutes
  • Yield: Serves 4 to 5

Taste the raw celery you plan to use in this soup. The celery should be fresh and good on its own, not old or bitter. If you have a particularly tough or bitter bunch of celery, please don’t use it in this soup, find another use for it.

Ingredients

  • 3 Tbsp butter, divided into 2 Tbsp and 1 Tbsp
  • 1 cup chopped onion
  • 1 1/2 cups sliced leeks, white and light green parts only
  • 5 cups of chopped celery, and 1 1/2 cups of diced celery  (from one large bunch of celery or two small bunches)
  • 2 cloves garlic, minced
  • 2 bay leaves
  • 4 cups chicken stock
  • 1/2 teaspoon to 1 1/2 teaspoons of salt, to taste
  • 1/4 to 1/3 cup of cream
  • Freshly ground black pepper to taste
  • Fresh chopped chives or parsley for garnish
  • MethodHide Photos

1 Sauté onions, leeks, 5 cups of chopped celery: Melt 2 Tbsp butter in a thick-bottomed 4 to 5 quart pot on medium heat. Add the diced onion, the leeks, and 5 cups of the chopped celery.

creamy-celery-soup-method-1 creamy-celery-soup-method-2

Cook on medium heat for 10 minutes until softened. Add the minced garlic and cook for a minute more.

2 Add stock, bay leaves, salt, then simmer: Add the chicken stock and bay leaves to the pot. Taste for salt and add salt. (If you are using unsalted butter and unsalted stock, you will need to add more salt than you expect, if not, maybe just a little salt will be needed.)

creamy-celery-soup-method-3 creamy-celery-soup-method-4

Increase heat to bring to a boil, reduce heat to low and cover to maintain a simmer. Simmer for 15 minutes.

3 Braise remaining celery to soften: While the soup is simmering, prepare the extra celery that will be added later to the soup. In a separate small sauté pan, melt 1 Tbsp of butter on medium heat. Add 1 1/2 cups diced celery to the butter.

creamy-celery-soup-method-5 creamy-celery-soup-method-6

Ladle 1/2 cup of the simmering stock from the soup pot into the sauté pan. Simmer on low for 5 or 6 minutes to soften the celery. Set aside.

4 Purée soup: Remove the soup pot from heat, let cool slightly. Remove and discard the bay leaves. Working in batches, purée the soup in a blender, filling the blender no more than a third full at a time (keep your hand on the lid so the hot liquid doesn’t explode). Return the puréed soup to the pot.

Source: simplyrecipes.com